Showing posts with label easy. Show all posts

Monday, 21 April 2014

Eggplant Dip


Second to last recipe before the site update - are you excited? ;P
You should be! I've been working on a logo, banner and watermark. :) It should be updated within the next two weeks (tops!). I just have a few last things to finish, (like the tons of info that needs updating on here).

Anyway, (getting a little side tracked here...) I present to you, for your snacking needs; Eggplant Dip. 
Woo!

My housemate and I were wondering how eggplant got it's name, and after some research we came up with this:

1. The original eggplant looked more like a goose-egg and was a yellowish colour 
2. The eggplant is actually the fruit of a plant called eggplant

I'm not sure which one is correct, although it's more likely they are both correct, at least partly, but I did find out that the origin was China. :)

Eggplant Dip

Ingredients 

  • 4 medium sized eggplants
  • 2 tomatoes
  • 1 red onion
  • 3 garlic cloves
  • 3 tablespoons of oil (rice bran, vegetable, canola etc.) + a little extra for coating
  • 1 teaspoon of turmeric powder
  • 1 teaspoon of cumin powder
  • 1/4 teaspoon of chili powder
  • 2 teaspoons of sweet chili sauce
  • 2 teaspoons of salt or vegetable stock
  • a handful of parsley 
Prep time: 10 minutes
Cook time: 50 minutes 


Preheat oven to 180C (350F), then line a baking tray with baking paper. Place the four eggplant onto the tray, sprinkle a little oil and vegetable stock on them, rub them until mixture spreads all over, then place them in the oven for 40 minutes. (You can check at the 20 minute part to turn them).

After the egg plant have been in the oven for 20 minutes:
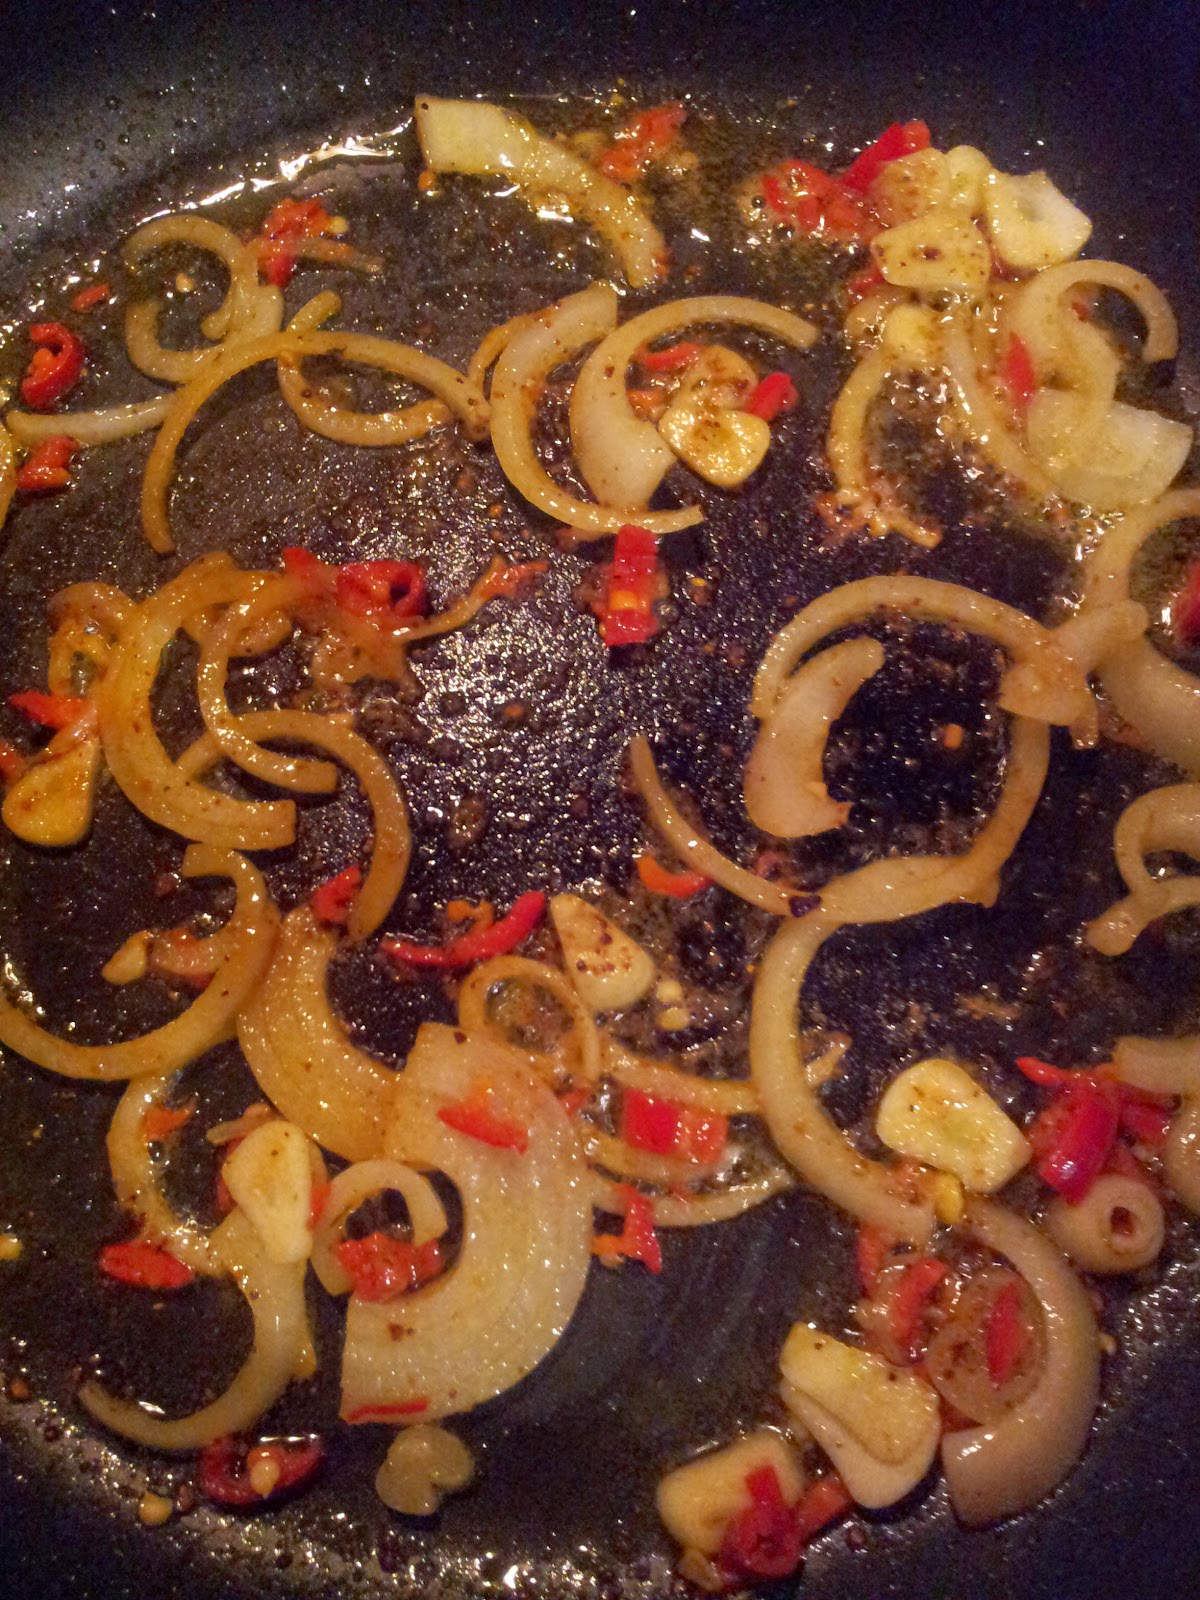
In a medium-large pan, on a medium heat, put the 1 tablespoon of oil, sliced onion and garlic, then cook for 2-3 minutes.
Next, add the spices to the pan and cook for a further 3-5 minutes until the mixture is fragrant. 

Add the roughly chopped tomatoes, and sweet chili sauce to pan, and cook until the tomatoes begin to get soft. (5-10 minutes) 
It should be about time to take out the eggplant from the oven. They should be mostly soft and mushy (it's okay if they're not completely for they will cook a little longer in the pan)
Roughly tear the eggplant into large chunks, then add it to the pan with the rest of the ingredients. Allow to cook for a further 5-10 minutes so that it combines.
Let it cool for 10-15 minutes, then put it into a blender and blend until it's a thick, smooth, creamy paste. 
You can have this dip with just about anything. ;)
I like mine with wedges! ^^

Hope you liked this one. See you in my next update, which will be the last one before the site upgrade!!! :O

xo.
Moonlight

Sunday, 13 April 2014

Vegan Pad Thai & Other News

Ah, I'm glad to be back, yknow. 
And to celebrate there's going to be two new special things.

Firstly, I'm going to improve the layout of this place sometime this upcoming week. I'll tidy it up, make it look a little nicer and even add a banner (gasp! that's crazy right?!).

and secondly,

I'll be getting a digital camera soon! :'D

Well technically, my housemate and I will be getting one for our little craft business, but I will be able to use it for taking pictures for this blog. No more crappy phone pictures! Woo! 

Anyway, to celebrate my return, I give to you a delicious vegan Pad Thai. The kind that will make you wonder why you never had this version to begin with. ;)


I'm sure I've mentioned this before, but it's winter (well Autumn technically... but my frostbitten toes like to say otherwise) where I live, and in those cold, dark recluse months it is habitual for people all around the globe to start craving those cosy, warm and usually butter-smothered foods. Soups, stews, and casseroles become the staple of people's diets.

And it's true, while those dishes have their alluring, siren-song charm, there's something else, which is often overlooked, that comforts me and gets me through those long formidable months... and that something is spicy food.

No matter how cold it gets, as long as I have a big bowl of chili I know I'm going to be alright. So, today's recipe, Vegan Pad Thai, is one of my main chilly season dishes. It'll put some fire in your belly! ;) 


Vegan Pad Thai

Serves:
Ingredients: 
  • 100g Pad Thai noodles or rice noodles
  • 1/2 broccoli bunch 
  • 125g firm tofu
  • 1/2 brown onion
  • 2 cloves of garlic 
  • 1 red or green chili (the medium sized ones not the really small ones)
  • 1/2 red capsicum/bell pepper 
  • 50g peanuts 
  • 1 handful of beansprouts 
  • 1-2 tablespoons of coconut oil (you can also use peanut oil, or you choice of vegetable oil) 
  • a small handful of chopped parsley (or coriander) 
  • vegetable stock, to taste 
For sauce:
  • 2 tablespoons of tomato paste
  • 2 tablespoon of kecap manis soy sauce (thick sweet soy sauce. you can use the regular kind too, but this one gives it a sweeter, thicker taste)
  • 1 tablespoon of white miso paste
  • 1 tablespoon of tamarind paste 
  • 1 tablespoon of sriracha sauce
  • 1 teaspoon of coconut sugar (you can also use regular cane sugar. If that's the case then brown sugar would work best, but any sugar will work fine)
  • 1/4 cup of filtered water 
Optional:
  • a few drops of sesame oil 
Prep Time: 10 minutes
Cook Time: 15-20 minutes

Before I do anything else, I first bring a medium sized saucepan filled with water to boil, then add the broccoli florets to it (I just break them off of the bunch and cut them if they're too big). I boil them for five minutes maximum so that they don't take so long to cook later. So, we're basically just blanching them. You can tell when they're ready to drain because they turn bright green. 

Next I cut the tofu into bite sized pieces. If you like you can marinate your tofu before hand (with some oil, garlic and lemon). I do this on days where I'm not lazy. ;P
Then, I fry it in a large pan with 1 tablespoon of coconut oil. I sprinkle a bit of vegetable stock so they soak up some flavour (you don't want them to be bland, yuk! >_<). If you like you can also sprinkle a little turmeric powder to give them a more golden colour. 

Whilst I'm cooking the tofu, I prep the onions, garlic and chili. I cut the onions into half moons, cut the garlic into slices, and cut the chili also into half moons (although, it really doesn't matter how you cut it).

After the tofu have begun to crisp slightly on the outside, and have gained a bit of colour, I set them aside in a bowl for later.

I add more coconut oil to the pan if needed, then add the onion, garlic and chili and let it cook and soften for a few minutes. While this is cooking you can cut the capsicum/bell pepper into long, thin strips (although as you can see, I'm not all about cutting them that thin. That would actually require me to be patient :P) When the onion mix starts become fragrant that's when you know it's time to add the capsicum/bell pepper.
After cooking on a medium heat for about 3-5 minutes, I then add the partly cooked broccoli and tofu. Then I chop the peanuts roughly and throw them in too. The peanuts I get are already roasted, but fresh ones would be fine too.

While this is cooking I bring a saucepan of water to boil again, then add the noodles. I find that a lot of brands have different cooking instructions, so it's best to follow what they say on how to cook them, but none of them will take very long. 

While the noodles are cooking I make the sauce which will bring everything together. <3
I add all the ingredients for the sauce together in a small bowl and mix until combined.

Note: I find it best to dissolve the miso in 1/4 cup of the water used for the sauce before adding it in. Make sure it's boiling water so it dissolves properly. This is so the sauce isn't lumpy (let's face it, no one wants a large clump of miso in their mouth). It's okay if it doesn't dissolve 100%, as long as it's mostly dissolved. 
Once the noodles are cooked I drain them and add them into the pan along with the beansprouts. I mix until everything begins to combine, then I pour in the sauce and mix that through. If the sauce is too thick, you may want to add about a tablespoon more of water.
Let it heat through for a few minutes, and at this stage you can add 3/4 of the parsley and mix it through. Then simply serve and sprinkle the rest of the parsley on top. 

Hope you liked this recipe!

xo.
Moonlight

Tuesday, 18 March 2014

Simple Vegan Pastry


Hi there, my little sugar kittens, today I'm going to share a quick recipe - vegan pastry!
You can make this with only a few ingredients and use it for things like pies (savory) and quiche, or just about anything you would use a savory pastry for.

Okay, let's begin, shall we?

Simple Vegan Pastry 

Ingredients 


  • 2 1/2 cups of plain Wholemeal Flour (or you could use white flour)
  • 2 teaspoons of Sugar
  • 2 teaspoons of Salt
  • 130g of Vegan Butter (I use Nuttelex) 
  • 1/2 cup of cold, filtered Water
Put the dry ingredients together in a mixing bowl, then add the butter (I half melt mine before putting it in).
Mix it together, then add the water gradually, until you have a sticky, yet elastic dough. You may need more or less water, just use your best judgement. 
When you've got it to the texture that you want it, take it out of the mixing bowl and place it onto a lightly floured surface, then knead the mixture until it firms slightly.
Note: Don't knead for too long otherwise it will become tough and rubbery when you cook it. 

Keep in an airtight container in the fridge, for up to a week, or up to 6 months in the freezer.


Things to do with your pastry:
Mini Vegan Pizza Pies 

xo.
Moonlight. 

Friday, 14 March 2014

Things To Do With Your Vegan Chocolate #2: Comforting Hot Chocolate

If you're looking for another way to use your Healthier Vegan Chocolate, then look no further!

Just make a simple hot chocolate with it.

Easy, right?

You'll need just three things:

  • Milk
  • Chocolate
  • Mug
;)

Measure the milk in your mug of choice, then place it in a saucepan with the chocolate (I used 40g) and stir until combined. 


You can sprinkle a little cacao powder on top too, if you like.
Now, sit back and enjoy your vegan hot chocolate.
xo.
Moonlight.

Thursday, 13 March 2014

Things To Do With Your Vegan Chocolate #1: Coconut Ice Cream Sundae

While eating chocolate by itself is amazing, it can never hurt to make it even better!

If you made the Healthier Vegan Chocolate from my previous post, and you're wondering what to do with all 46 pieces of chocolate, then why not have a sundae with rich, hot, chocolate fudge sauce? 

Yay, sundae time!
What could be better, right?

You'll only need a few ingredients!
  • Your Ice Cream of choice
  • 25g of Coconut Milk Powder
  • A handful of Pistachios
  • Vegan Chocolate (amount will vary depending on how much fudge sauce you want, I used 50g. If you use less, then you want to use less of the coconut powder too).   
Just like how you made the chocolate, place a metal mixing bowl over gently simmering water, add the chocolate, let it melt, then add the coconut powder. Mix well, and let simmer for 2 minutes so that the ingredients combine properly (otherwise it may be grainy, and you want it to be velvety smooth). If it gets too thick, or looks chunky, just add a little almond milk (or milk of choice), so it becomes thinner and smooth.
Place the pistachios in a sandwich bad, and then beat them with a rolling pin, or other had object until they're crushed to your liking.
Assemble sundae how you want it. :)
Enjoy!


xo.
Moonlight.


Wednesday, 12 March 2014

Healthier Vegan Chocolate!


Chocolate.
Is there any better place to start a vegan food blog?

Not in my world!

Chocolate has always been my favourite thing. I mean, what's not to like? 

It's dreamy, creamy, and euphoric, like you could be whisked away on a cloud carried by angels after the first bite. 

And now you can have the healthier option for those moments when sudden mood swings strike, when you want to have a guilt-free treat, or when you simply need chocolate to keep the fabrics of the universe from unraveling. 

You know, we've all been there. 

This recipe is a vegan adaption of a recipe my friend gave me.
Hope you enjoy!

Easy Vegan Chocolate

Ingredients 


  • 1 cup of Coconut Oil
  • 1/2 cup Vegan Butter (I use Nuttelex, or you could simply use another 1/2 cup of Coconut Oil)
  • 1/3 cup of Avage 
  • 1/2 teaspoon of Vanilla Extract 
  • A pinch of Salt
  • 1/2 cup of Cacao Powder 
Bring a saucepan of water to a light simmer (you don't want the heat to be too high or it might burn the mixture), and place a large metal mixing bowl over the top. 
Add the coconut oil, vegan butter & agave to the bowl, and mix until it is melted.
Coconut Oil, Nuttelex and Agave being mixed together :)
Add the salt and vanilla, and mix until combined. Now you can add the cacao powder and mix until smooth. 


Now you'll need either chocolate molds, or a container/tin. You will need to use baking paper, if you're not using molds, so that the mixture doesn't stick. 
I used these cute heart and animal molds, tee-hee! ^_^
Spoon the mixture into the molds, and don't worry if you spill, I sure know I did! :P
Note: As you're spooning the mixture into the molds, be sure to stir the mixture in the bowl before ladling each spoonful, otherwise the chocolate mixture will separate and cause some of the chocolates to set this way (as I learned with my first batch). If this happens though, don't worry, they're still edible and delicious, they just won't look as nice as the ones which set properly :) 

Put the chocolate into the fridge for 4-6 hours (or overnight if preferred), or if you want a super-speedy option, put them into the freezer and they should be ready within an hour (depending on your freezer).


I made 46 chocolates from this recipes. 
Needless to say, my chocolate cravings will be satisfied for a while. Well, at least a day or two. :P Maybe.

I hope you enjoyed this recipe!
If you have any questions, or you would like to tell me how you went making these, then send me an email at, moonlight.shimmer.goldenage@gmail.com
I'd love to see how you went! ^_^

Note:
If you're looking for a few ways to use this chocolate, other than just eating it straight (and there's nothing wrong with that, believe me! :P) then here's a few ideas for you:


xo.
Moonlight.